
Documento Confidencial
Autor: Miguel Angel Esqueda Olivo
Gerente de Infraestructura
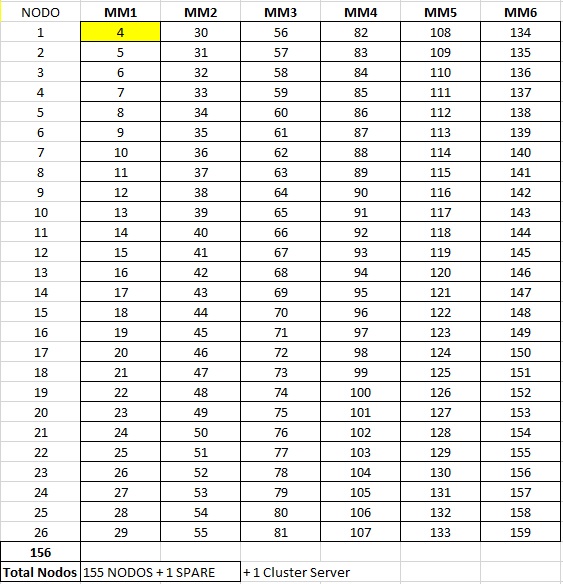
Biometria Nodos y Dongles
DISTRIBUCION NODOS EN MEGAMATCHER
ERROR DE DONGLE AUSENTE
1535977267:server.c:4836: running_tasks_add_results: WARNING: node 72 failed task 169952: node is not registered
1535977267:server.c:4798: running_tasks_add_results: WARNING: unable to find 169952 task in running tasks
1535977267:server_node.c:141: receive_results_from_node: ERROR: failed to add results for task 169952 from node 59
1535977272:server.c:4836: running_tasks_add_results: WARNING: node 71 failed task 169953: node is not registered
Veeam Ligas Informacion
SE PUEDE HACER GRATIS UN TRAINING – DEMO GRABADA 1 HR 9 MIN.
https://www.veeam.com/university.html
TUTORIAL EN FLASH
http://veeam.foonet.be/
GUIA DE USUARIO
https://helpcenter.veeam.com/docs/backup/vsphere/install_vbr_launch.html?ver=95
MEJORES PRACTICAS EN GENERAL
https://bp.veeam.expert/
COMO ABRIR TICKETS DE SOPORTE
https://www.veeam.com/kb1771
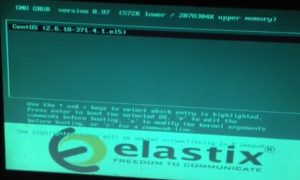
Elastix Boot Options and Repair
Conectar Monitor y Teclado a PBX
Encendemos el PBX y al aparecer la ventana de GNU GRUB damos flechas arriba y abajo en teclado y despues elegimos la opción requerida
ENTER: Continuar el Boot Normal del server
«e»: Para editar la linea de comando antes de bootear
«a»: Para editar los argumentos del kernel antes de Bootear
«c»: Para iniciar con la linea de comandos
Al seleccionar la opcion «e» nos aparecera la siguiente pantalla
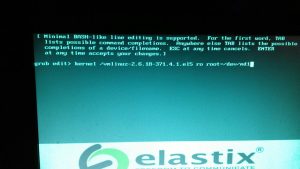
Aquí al final agregaremos: init=/bin/bash
para guardar damos «enter» y para arrancar damos «b»
PARA DARLE UN CHEQUEO AL DISCO DURO UTILIZAMOS EL SIGUIENTE COMANDO
fsck -y
PARA APAGAR EL SERVER UTILIZAMOS EL SIGUIENTE COMANDO
shutdown -r now
ESTABLECER PASSSWORD DE ADMIN DE LA INTERFAZ WEB DEL XORCOM
cd /usr/bin/
sqlite3 /var/www/db/acl.db «UPDATE acl_user SET md5_password = ‘`echo -n password|md5sum|cut -d ‘ ‘ -f 1`’ WHERE name = ‘admin'»
CUANDO ARRANCAMOS DESDE UNA USB CON OTRO SISTEMA OPERATIVO LIVE LINUX
Opciones de LiveCD: CentOS-6.2-x86_64-LiveCD.iso ; CentOS-7-x86_64-LiveGNOME.iso
En una linea de comandos se ejecuta como root
fdisk -l y ahí identificas el disco duro del xorcom
y hacemos el fsck -y /dev/sda1 o sdb1 según lo que te aparezca en fdisk -l
Con esto debe de comenzar la reparación.
CUANDO EL SERVER ARRANCA CON ERRORES PERO SI CARGA EL FILESYSTEM APARECERA LA SIGUIENTE PANTALLA
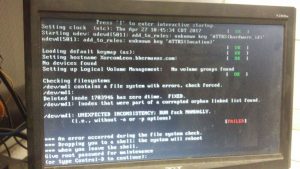
Tecleamos el password de root (no aparecera nada en pantalla) y damos ENTER
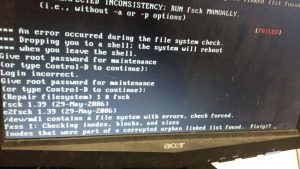
Aparece:
(Repair filesystem) 1#
Damos el comando: fsck -y
En caso de darlo sin el parametro -y nos pedira confirmación en cada error que detecte (como lo muestra la pantall anterior.
Cisco 867 Cambiar A Salida Por Modem
Documento Confidencial
Comentarios